Profile Nurse Icon: A Practical Embroidery Review
Most embroidery designers I know have a soft spot for clean, instantly recognizable iconography. The Profile Nurse Icon arrived in my digital workspace, and straight away I knew it could simplify a dozen project briefs that had been sitting on my desk. What I’m sharing here is not a generic product walkthrough. It’s the kind of honest assessment I’d give a fellow small business owner who needs to know whether this design will actually hold up on a finished product, please a customer, and avoid the usual stitch-out dramas.
First Impressions and Visual Readability
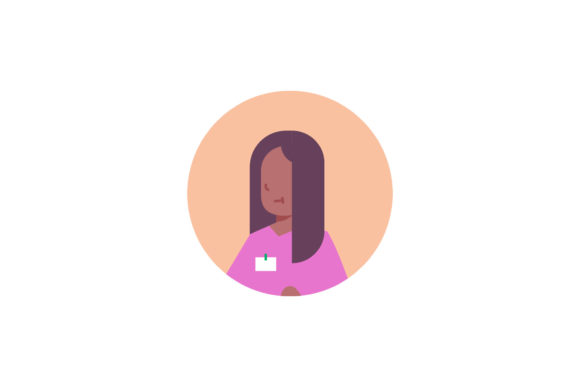
Opening the files, I was greeted by a silhouette that feels calm, professional, and quietly caring. The shape is a side profile, with the nurse’s cap and a subtle nod to the medical cross worked into the headpiece. The curves are smooth, the proportions are balanced, and there is no unnecessary clutter. For an embroidery designer, that simplicity is gold. A design that relies on a strong silhouette rather than fussy internal lines will read beautifully even when scaled down to a chest pocket or a baby bib.
The 1920px by 1280px canvas size gives you a solid reference, but since the download includes AI, EPS, and SVG files, you are really working with vectors that can be resized without losing any crispness. I immediately dropped the SVG into my digitizing software and traced the outline. The path quality was clean, with very few stray nodes — that matters when you’re about to map out satin stitches and fill stitches. The mood is gentle, which makes it versatile for thank-you gifts, retirement keepsakes, and everyday appreciation items.
Where This Design Shines in Real Projects
I recently had a customer order a batch of custom tote bags for a nursing team. The Profile Nurse Icon was a natural fit. I digitized the design at around 4 inches wide, tested it on a medium-weight cotton canvas with a cutaway stabilizer, and the result looked like a professionally branded product. The icon’s silhouette translated into a smooth satin stitch border with a light fill stitch interior, and the lack of tiny internal details meant no thread breaks and no puckering.
This design is also a strong candidate for sweatshirt embroidery. On a crewneck or hoodie, placed on the left chest or centered on the back, the icon reads as a minimalist badge of honor. I’ve seen similar icon-based designs used on embroidered patches, caps, pillow covers, and even kitchen towels for nurse-themed gifts. The Profile Nurse Icon could easily sit on a patch with a decorative merrow border, or become the focal point of a personalized gift set that includes a mug, a tote bag, and a framed print.
For Etsy sellers and craft fair vendors, the design’s recognizability is a huge asset. Customers scanning a product feed often pause at a symbol they connect with emotionally. A nurse icon sparks that instant recognition. When you stitch it onto a tote bag or a baby blanket, the perceived value of the finished product rises because the design feels intentional and thoughtful, not like a generic clip-art afterthought.
Tricky Fabrics and Small Hoop Challenges
No design is foolproof on every fabric. The Profile Nurse Icon, while forgiving, still needs a thoughtful approach. On textured fabrics like terry cloth or waffle weave, the silhouette can lose definition if the stitch density is too low. I always recommend a heavier satin stitch outline and a fill stitch with a slight underlay when working with plush surfaces. On thin or stretchy fabrics — think performance tees or baby onesies — a good no-show mesh stabilizer is non-negotiable. Without it, the design can shift and distort the cap profile.
Small hoop sizes require extra care. If you compress the icon below 2 inches, the cap’s cross detail may start to close up. In those cases, I simplify the digitizing: I might switch to a running stitch for the cross or widen the satin column slightly. The design still holds its identity, but you need to test it on scrap fabric before committing to a final piece. Dark fabrics, especially black or navy, call for high-contrast thread colors. I often use a soft white or pearl grey thread for the main silhouette, and a subtle red for the cross accent, which pops beautifully against a dark background.
Curved surfaces like caps and hats can be tricky because the profile shape is horizontal by nature. Placing the design on a structured cap front might require a slight rotation or a custom hoop that follows the hat’s curve. I’ve had success using a 4-inch hoop and floating the cap on a magnetic hoop system, but novices should definitely do a practice run first.
How the Profile Nurse Icon Elevates Your Product Line
From a branding perspective, icons like this create visual consistency across a small shop. If you offer a range of nurse-themed handmade products — a tote bag, a zipper pouch, a keychain, a patch — using the same Profile Nurse Icon ties everything together. Customers who purchase a sweatshirt might later come back for a matching baby bib or a pillow cover, and the cohesive look builds trust and repeat sales.
The design also lends itself beautifully to holiday embroidery, especially around Nurses Week, Christmas, or Mother’s Day. I’ve seen smart crafters pair the icon with a short text like “Super Nurse” or “Best Nurse Ever” and turn it into a boutique product that sells out quickly. The icon’s simplicity means you can layer it with other design assets — a floral wreath, a heart, a monogram — without the composition feeling overcrowded.
For digital product sellers, the vector files are a time-saver. You can use the AI or SVG to create printable mockups, product previews, or even sublimation templates. That cross-medium flexibility is rare and valuable when you’re juggling multiple product types.
Designer Tips for Stitching Out the Icon
I’ve tested similar icons enough times to know what trips people up. Here’s a quick list of practical steps I follow before any embroidery project hits the final product:
- Test on scrap fabric. Always run a stitch-out on the same material and stabilizer you’ll use for the final piece. Check for thread tension, puckering, and gaping.
- Check thread color contrast. Hold the thread spools against the actual fabric under natural light. What looks good on screen might wash out on a real garment.
- Review stitch density. If the satin stitch feels too heavy, scale it back slightly. A dense design on a soft fabric can feel like a stiff patch, which isn’t comfortable for apparel.
- Confirm hoop size. The vector can be scaled, but your embroidery machine has limits. Measure the design’s width and height before digitizing, and make sure it fits your hoop with a little breathing room.
- Inspect small details. Zoom in on the cross and the cap line. If they are thinner than 1mm after scaling, they may disappear in the stitch. Adjust the digitizing accordingly.
- Test in black and white. Convert the design to a monochrome mockup to see if the silhouette still reads. This helps you spot any over-reliance on color contrast.
- Compare light and dark fabric backgrounds. The same thread color can look completely different. I keep a swatch book of my most-used threads on both white and black fabric.
- Use proper stabilizer. Cutaway for knits and stretchy garments, tear-away for stable wovens, and a topper for high-pile fabrics. There’s no one-size-fits-all.
Licensing and Commercial Use: What You Need to Know
The product description lists six digital files and a canvas size of 1920px by 1280px. You receive AI, EPS, and SVG formats. What isn’t spelled out is the license scope, and that’s something every embroidery business owner must clarify before selling finished products. The files are graphics, not ready-to-stitch machine embroidery formats like PES or DST, so you’ll need to digitize the design yourself. That’s standard for a graphics product, but it’s worth stating clearly: this is a design asset, not a plug-and-play embroidery file.
Before you list a tote bag or a sweatshirt featuring the Profile Nurse Icon on Etsy or your own website, reach out to the seller and confirm that commercial use is allowed. Some designers permit limited physical product sales, others require an extended license, and some restrict reselling of the digitized embroidery file itself. I always keep a screenshot of the license terms in my project folder for peace of mind.
Where This Icon Fits in a Growing Craft Business
If you’re building a lineup of nurse appreciation products, the Profile Nurse Icon is a versatile foundation. It can anchor a set of embroidered patches, become the hero of a personalized tote bag design, or add a thoughtful touch to a baby embroidery gift for a nurse’s new arrival. The icon’s restrained, respectful visual language means it appeals to a wide age range — from young nursing students to retirees — which broadens your customer base.
I’ve also used similar icon files to create quick printable mockups for my Etsy listings. Importing the SVG into a design tool and placing it on a digital tote bag or cap preview helps customers visualize the finished product without needing to stitch a sample first. That alone can speed up your listing process and improve buyer engagement.
The Profile Nurse Icon doesn’t try to do too much, and that’s exactly why it works. In a world of overcomplicated embroidery designs, a clean, meaningful icon lets the thread and the fabric do the talking. When you stitch it out with care, the result is a finished product that feels considered, professional, and deeply personal — exactly what customers in the handmade market are looking for.